
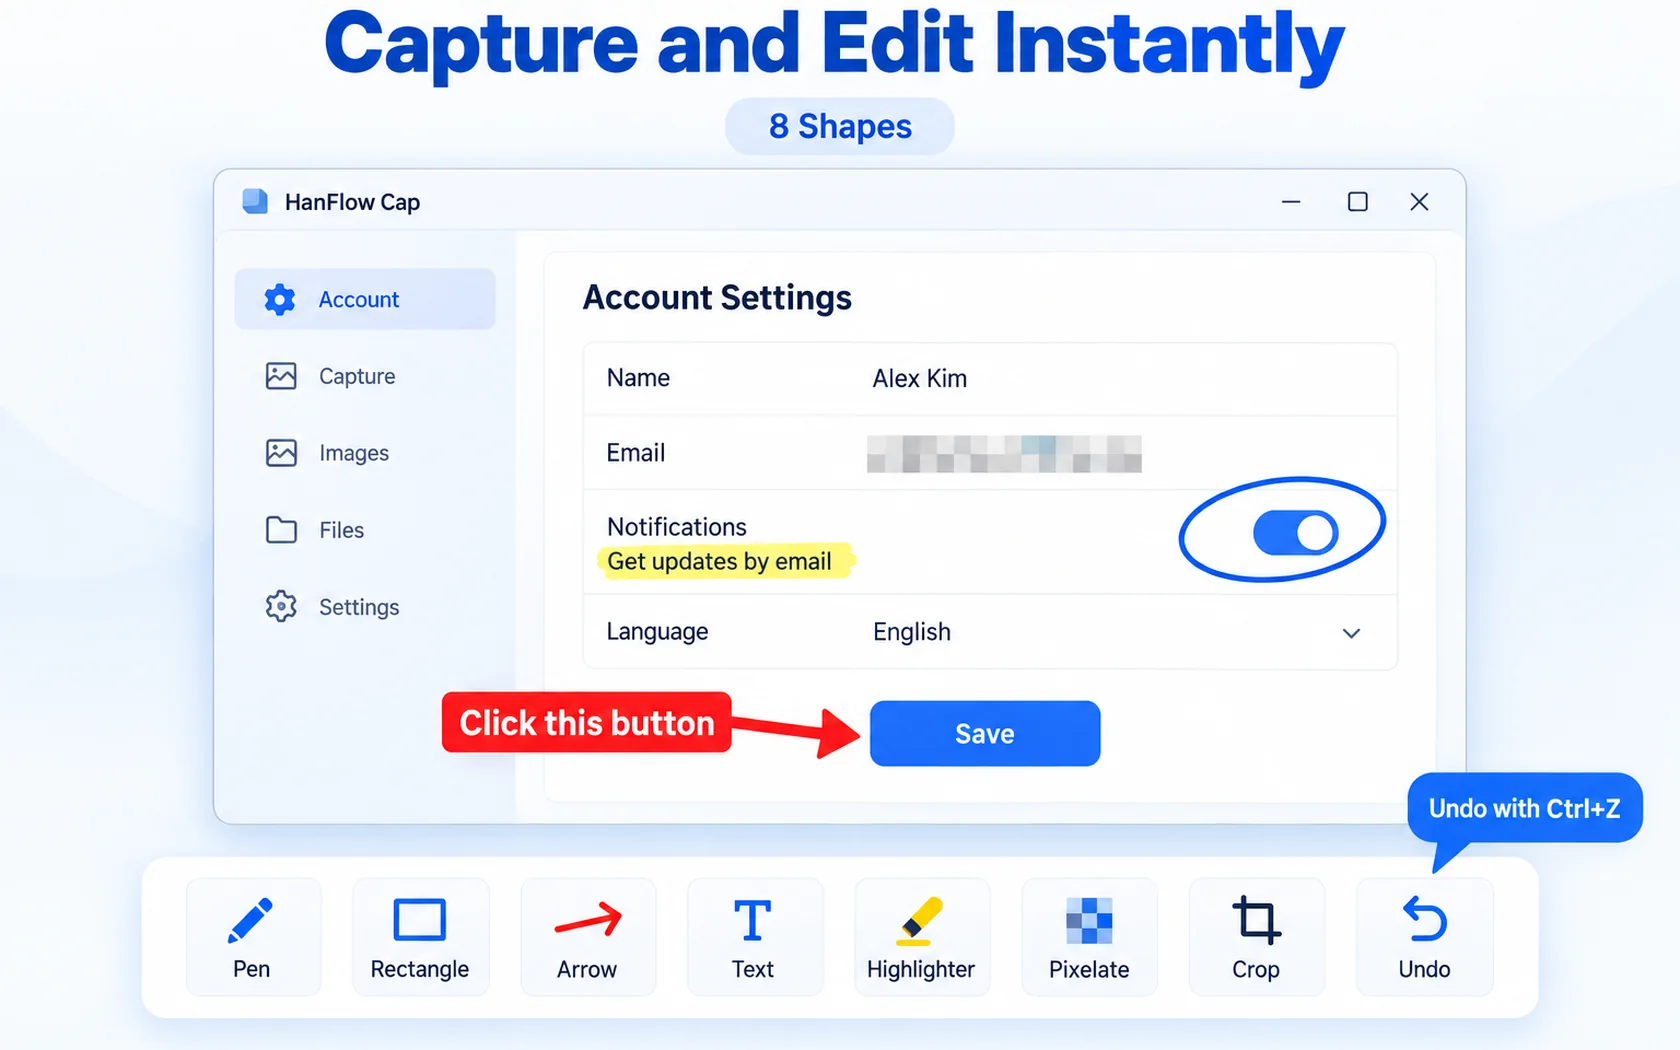
Take a screenshot with HanFlow Cap (Ctrl+Shift+A), select Mosaic in the edit toolbar, and drag a rectangle over the area you want to hide. For passwords, account numbers, or anything that should vanish completely, choose Redact instead — it covers the area in solid black. Press Ctrl+S to save or Ctrl+C to copy, and the blurred or blacked-out version is what goes out.
Blur with Mosaic
- Press Ctrl+Shift+A to start a region capture and drag over the area you want to grab.
- In the edit toolbar that appears, click Mosaic.
- Drag a rectangle over the part of the screenshot you want to blur. The area is pixelated immediately — the pixels are averaged into square blocks.
- Repeat for each spot that needs blurring. You can draw as many mosaic rectangles as you like.
- Press Ctrl+S to save to your Pictures folder or Ctrl+C to copy the edited image to the clipboard.
The block size scales with the image: blocks run from 6 to 24 pixels depending on the size of the capture, so a mosaic looks proportional on a small dialog or a full screen. If you want even chunkier blocks — useful for large text — set Stroke to 8 or 12 px before you drag. That doubles the block size.
Black out with Redact
Redact works differently from Mosaic. Instead of pixelating, it paints a solid black rectangle over the dragged area. The color is always black regardless of the color you have selected in the toolbar.
Why does that matter? Mosaic pixelates, which means rough shapes and outlines can still hint at what was underneath. Redact replaces those pixels with black. When the screenshot contains a password, a card number, or an account balance, Redact is the safer pick.
Mosaic or Redact?
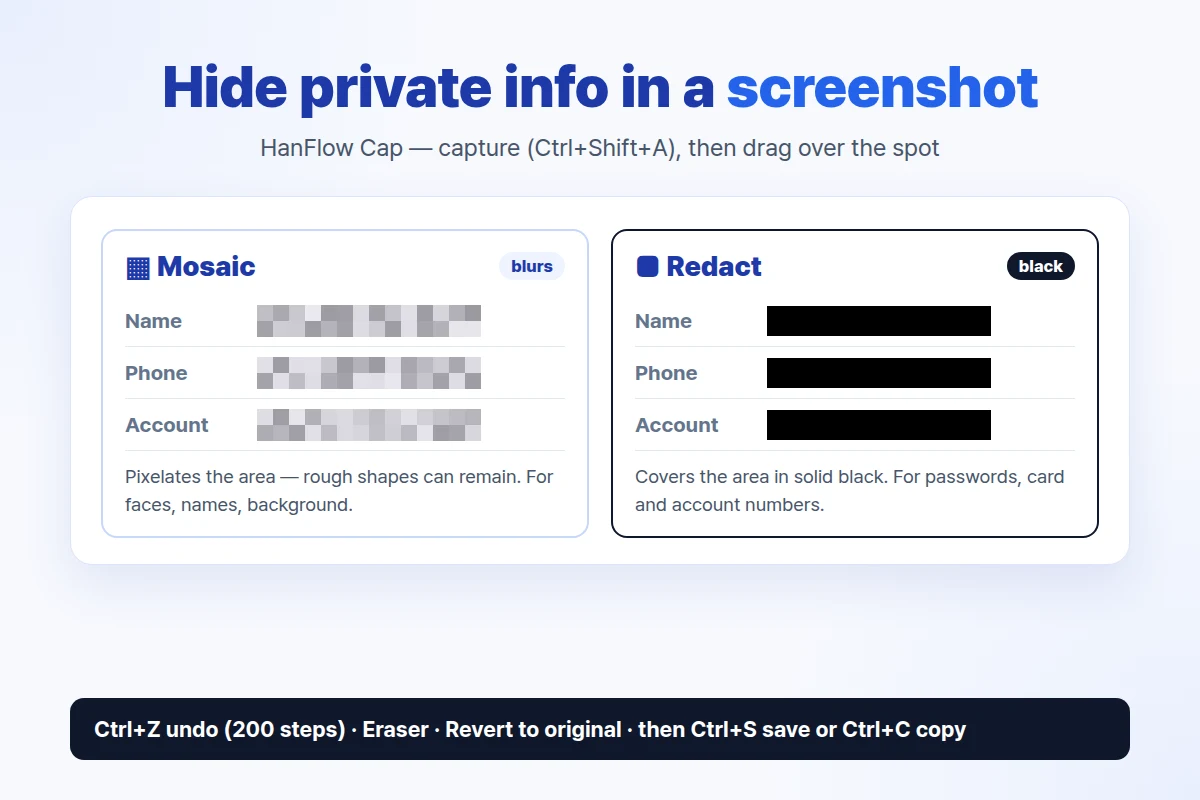
- Mosaic — faces in a group photo, background details, names you want to soften but not erase. The pixelation signals that something was there without revealing what.
- Redact — passwords, credit-card or bank-account numbers, mailing addresses, ID numbers. A solid black bar leaves nothing to guess at.
Fix mistakes
Press Ctrl+Z to undo. HanFlow Cap keeps up to 200 undo steps, so you can walk back through a long editing session one action at a time. Ctrl+Y redoes what you just undid.
The Eraser tool takes a different approach: drag it over any marks — including mosaic and redact rectangles — and it restores the original capture underneath. Handy when you need to remove one specific rectangle without undoing everything that came after it.
If you want a clean slate, click Revert to original. It removes every mark at once and brings back the untouched capture.
You can also use Crop to cut away whole edges of the image. Drag to keep only the area you need; Ctrl+Z undoes the crop if you change your mind.
Before you share
The image you save or copy is the edited version — mosaic blocks, redact bars, and all other marks are baked into the pixels. That is the file other people will see. The capture list inside HanFlow Cap keeps the original capture.
One setting to watch: Save to Pictures folder on capture. When this is turned on, HanFlow Cap saves the original screenshot to your Pictures folder the instant you take it — before you have a chance to add mosaic or redact. If you are capturing something that needs information hidden, turn that setting off first, edit the screenshot, then save with Ctrl+S.
Save As (Ctrl+Shift+S) lets you choose among PNG, JPEG, BMP, and TGA formats.
Frequently asked questions
Can someone undo the blur in my saved image?
Redact replaces those pixels with solid black in the saved file. Mosaic replaces pixels with a block average (pixelation). For anything truly sensitive, use Redact rather than Mosaic.
Why doesn't anything happen when I click Mosaic or Redact?
Both tools require a drag. Click and hold, then drag a rectangle over the area you want to hide. A single click without dragging adds nothing to the image.
Can I remove a blur I already added?
Yes, as long as you have not saved yet. Press Ctrl+Z to undo, use the Eraser to drag away specific marks, or click Revert to original to strip all marks at once. A file you have already saved keeps the marks it was saved with.
Does it work after the 30-day trial?
Viewing existing captures continues after the trial ends. Taking new captures and saving or exporting require a license.
Related — learn how to capture a whole scrolling page or why HanFlow Cap works as a Snipping Tool alternative.